
Work has been rather busy of late, leaving me not much time to continue with my passions being either riding, photography, or this blog. But I am snatching an opportunity on a Sunday night to kick on again.
The next and easiest parts to assemble for my new MTB build are the forks and stem. The forks have been canabalised from another one of my bikes (my new BMC Fourstroke FS02) which were replaced by a set of kashima coated Fox Racing suspension forks. As a result, these forks are a reasonably high and recent spec being Fox Float 32 RL 100. These were pretty much standard on the medium level 26″ bikes and are a pretty decent set of kit. As the name suggests, the forks have 100mm of travel. The other aspect of the fork spec is that the fork stem is straight at 1 1/8″ in width – again standard at the time, but a lot of the newer forks are now tapered (I assume to allow for more stability and force to flow through the forks and subsequently the headset).

Being canabalised from another bike, one of the trickest parts of the construct – install of the star nut – had already been done. In addition, the length of the fork steerer tube was pretty much cut to the desired length, so no tube cutting required.
This is a star nut not installed.

And this is where it sits within the steerer tube.

The other parts that would be going on are the stem, for which I grabbed a 3T ARX PRO at 110mm in length. This component is not uber light, but then again I could stop eating sweets and lose a few kgs to achieve a more efficient weight saving.

There is one thing that is fiddly with this component, the torque setting on its six clamp bolts. For that I would need the first of many specialised tools that I will need to use to build this bike, a torque wrench. My Park Tool TW5 Torque Wrench is my new pride and joy in the tool box, though it does take some getting used to (that is another story).

And of course I would need a headset top cap with compression bolt and a couple of headset spacers (again recycled from old bikes). I will replace the cap with a bit of personalised bling, but I have to procure that part first.

The next part of the assembly was to place the lower crown race onto the top of the fork crown over the steerer tube. This is an important part to keep both the headset bearings sealed and fork into position (it is effectively a big washer).

I then pushed the fork through the headset, but without the wheels this was tricky because the wheels and weight of the frame were not pushing the forks up – I had to apply pressure on the frame to keep it in place.

The final step of this part of the assembly was to place the spacers, stem, and then compression bolt / cap onto the steerer tube and tighten everything up. I must admit that I had to do this a few times, as the first couple of times I either hadn’t got the components compressed down tight enough or spacer combination sorted properly. I used the torque wrench to tighten the clamp bolts to the required 5NM to ensure everything was the “right” tightness. The Zinn MTB maintenance bible also noted that it is important to put grease on the inside of the spacers and the stem so that they don’t seize up onto the steerer tube.

I will probably have to check the alignment again once I get the handlebar in place.
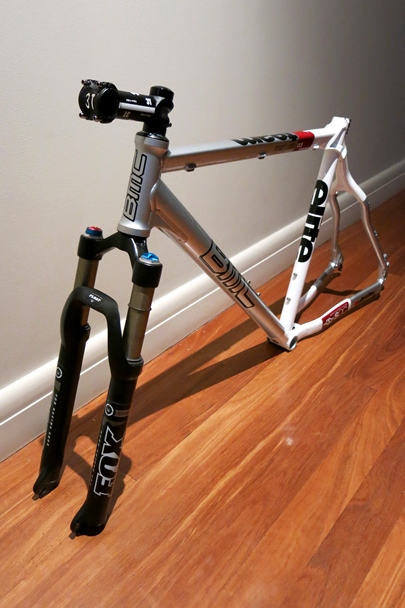
Here is the build so far, it is starting to look like a bike :-). I probably would have preferred to colour code the forks to the frame, but the second hand forks are too good to not reuse.
Next part of the assembly will be the wheels, and I already have a head start – that is for the next post.


Reblogged this on CYCLING LEARNING AND HEALING THE WORLD.
[…] was able to continue on from where I left off on the previous two stages of the build (part 1 and part 2). While I thought the next components of construction were going to be the wheels, I couldn’t […]
[…] contact points – the bar and grips. I had already got the frame (part 1), the forks and stem (part 2) and the seatpost and saddle (part 3) assembled. I had an idea that the additions of bling could be […]