
As I wrote previously, I turned my son ‘The Pok’ into a first rate Star Wars nerd. So when his 5th birthday came up, you can guess what he asked for – a Star Wars party. We were a little stumped as to what we should do for his party. Games, costumes, decorations, themed food, and well… all of the above. The first thing that came to mind that ticked off two items on the list was toy lightsabers for the kids. I have to admit that this idea was not original, but I thought that I would bring it to life in the most perfect way.
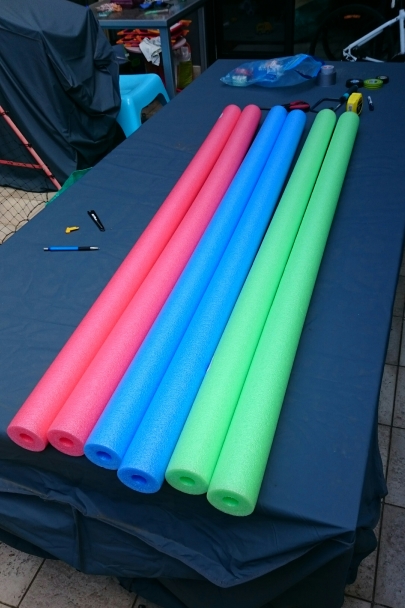
First I had to source the blades, and foam pool noodles were the trick. I went to Kmart to grab six of them. In doing so I whacked some poor young woman three times while navigating the aisles (after the third time she thought that either I was annoying or trying a very bad pickup routine – the former was the truth). I grabbed two of each of the major colours seen in the films; blue, green, and red. Grab the hollow ones if you can, the solid ones hurt a bit if you get properly whacked.
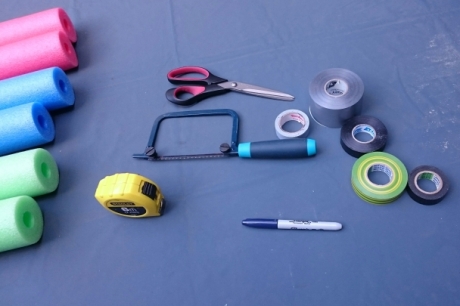
The tools required were:
- Measuring tape
- Scissors
- Coping saw (not essential and can be swapped for a Stanley knife)
- Permanent marker
- Electrical tape to represent the lightsaber hilt (different widths and colours – but make sure that you have a grey colour on hand)
- Some sticker dots (again not essential but adds to the detail)
- Mitre guide on horse (not essential if not using the coping saw)
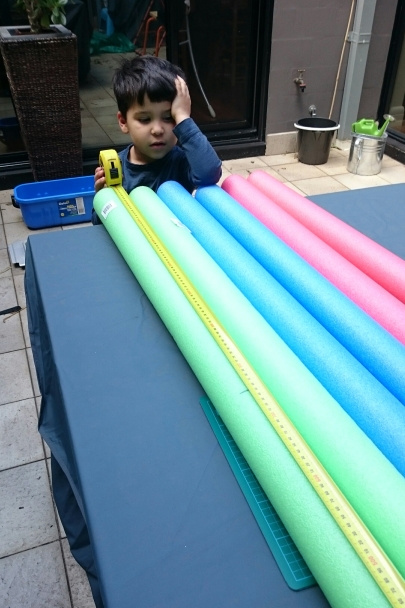
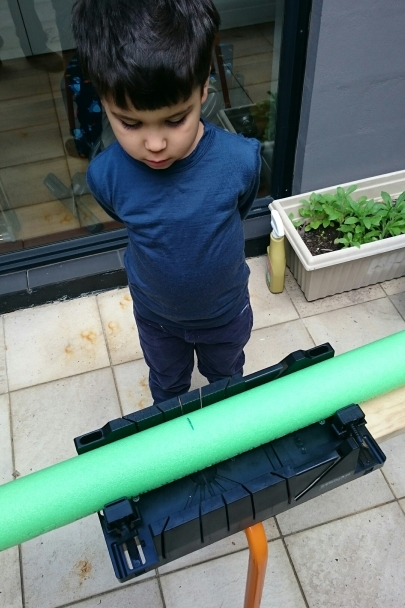
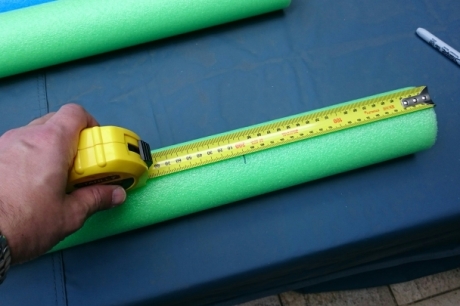
The six noodles would end up making 12 lightsabers. First we had to measure the halfway point so we could do some cutting. The Pok was obviously getting frustrated with my perfectionism. The noodles I bought where exactly 1500mm so a cut at 750mm would do the trick.
Then the noodle was cut in half using the guide and saw. The ends that were cut would end up being the hilt part of the lightsaber (so that the hilt could cover up any rough sawing and pen marks).
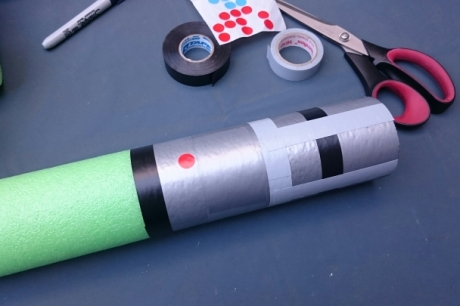
Now I had to measure the hilt, so from the edge that I cut I measured in 200mm. I came to this measurement as a good length for little 5 year old hands to be able to double grip the lightsaber. This length also offered enough room for detailing the laser sword’s hilt.
I wrapped the first band of electrical tape was around the noodle at the 200mm marker – which represents the emitting part of the hilt.
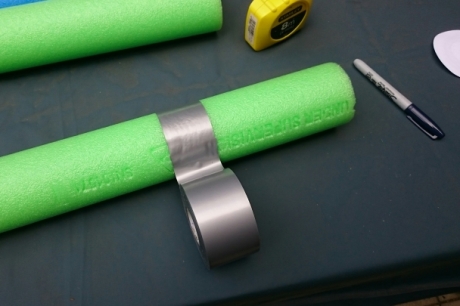
Then I wrapped the end in tape to top and tail the hilt of laser sword.
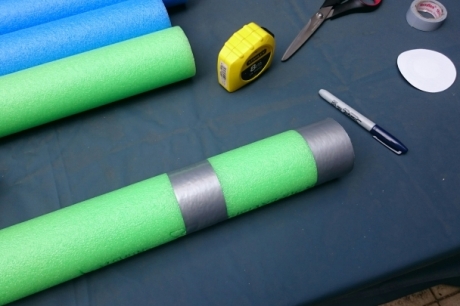
Filling in the gap with additional cuts of electrical tape allowed me to detail the hilt. I decided to be creative here and use varying cuts and colours of electrical tape to make a unique design for each lightsaber. A finishing touch was for the placement of one or more sticker dots representing the buttons to activate the blade (yes I am a perfectionist).
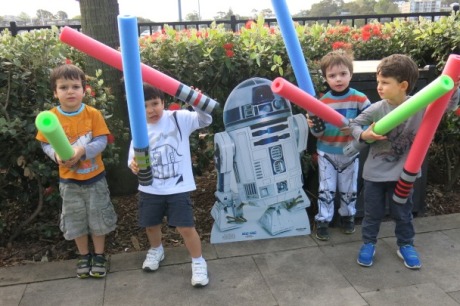
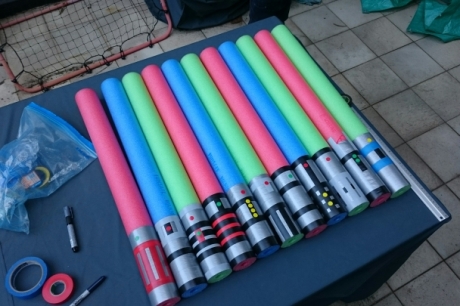
The end result was a collection of unique toy lightsabers for each child attending the party to could grab and play with, and at the end of the party take home along with their goody bag.
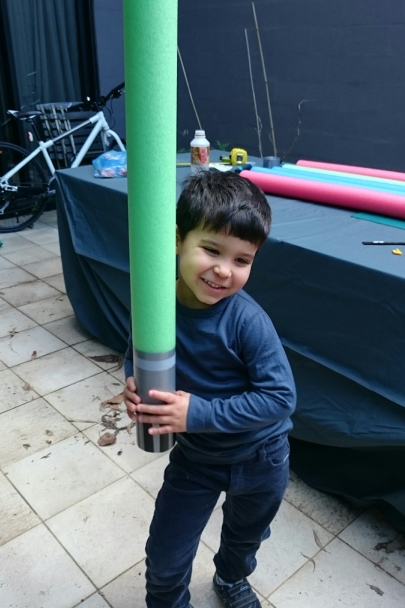
The Pok loved them, and as the birthday boy he received an extra special one with additional custom detail and some unique colours.
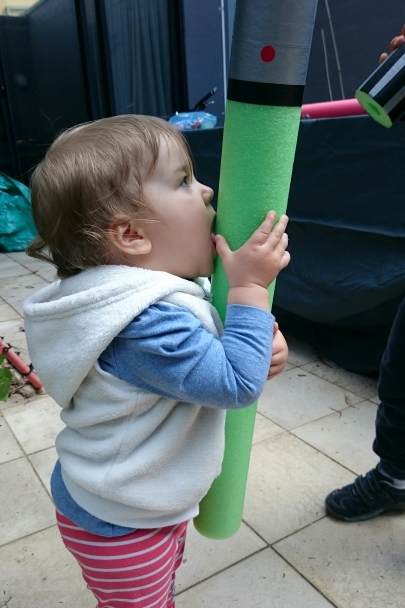
Kiki simply thought that her Daddy had just made up the largest ice lolly she has ever seen (then proceeded to try and whack her brother).
This was relatively cheap, a few dollars per noodle along with the cost of the electrical tape and a Saturday afternoon. The key was to make them unique. But watch out for; the kids fighting over the colours, little people ganging up on the parents, and a couple of bruised child egos from being left wanting in their fencing skills. As I was making them, my wife asked me “should we organise any games?” No need with these things, give them to the kids and let them whack each other for a few hours.
Last point – as a father yours must be red and of a b@d@ss design.


