
My new MTB Project had taken a pause with… life, but super sales from online cycling shops allowed me to acquire two key components for the contact points. The seatpost and the bar (handlebar). So construction was able to continue on from where I left off on the previous two stages of the build (part 1 and part 2). While I thought the next components of construction were going to be the wheels, I couldn’t resist installing a bit of bling with the saddle.
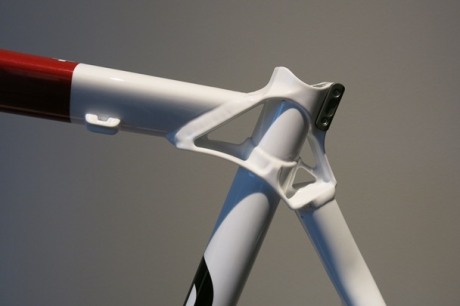
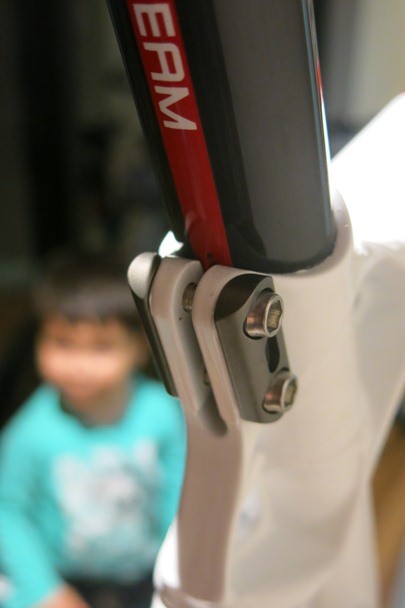
The frame that I acquired was quite unique in that seatpost clamp is built into the frame within the seat tube. The other aspect is the way the top tube and seatstays are connected to the seat tube is quite unique as well. I guess it is typical BMC Swiss design style.
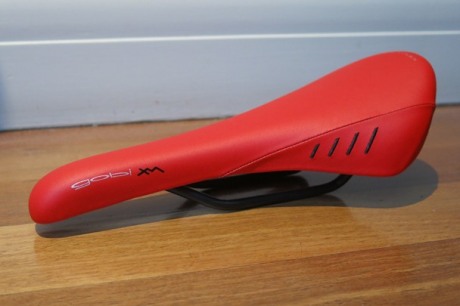
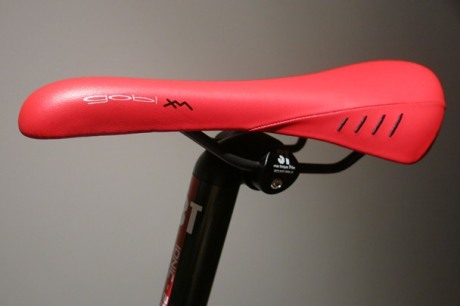
My saddle of choice for this build is the same as the one that I ride on my other MTB (VTT), a fi:zi’k Gobi XM. But not just in black, the one I acquired on eBay is bright red! Bling! I intend to match the colour to my bar grips. The Gobi XM is an awesome saddle, and perfect for anything off-road. It has the “wingflex” capabilities of the other fi’zi:k saddles and has that little bit of extra cushioning. On my second 200km Around the Bay in a Day, I swapped out my road saddle for the Gobi to get that little bit of extra comfort and it worked (i.e. my butt was not sore from the ride). So from a comfort point of view it works on the long distance haul too. The other great characteristic of this saddle is the clip system that allows me to connect up my saddle bag directly into the clip under the saddle. I have no intention of grabbing another saddle bag, just swapping it out between my two off-road rides when needed.
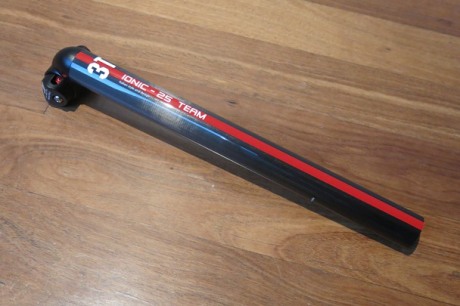
Being a hardtail ride, I wanted a bit of additional comfort for my rear contact point. The frame is alloy, so I chose to spec up the seatpost to carbon (flex and strength rather than just strength). Keeping with the Italian component theme, I found a heavily discounted 3T Ionic Seatpost in the team edition colours (i.e. with a bright red stripe). It looks the business, if only they made it in white…
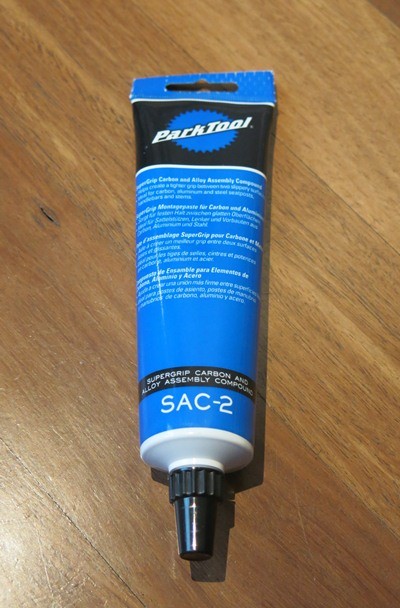
To assemble the seatpost into the frame, I was going to need both my Park Tool torque wrench and a special fluid compound for carbon and alloy assembly. Again I sourced the Park Tool stuff for the job – the SAC-2 compound. This stuff is critical for two reasons, primarily it provides extra grip between the two different material types through silicon bits in the fluid, but secondarily it provides a waterproof seal down the seatpost.
After first measuring the distance between the centre of my crank and seatpost to saddle clamp, I liberally applied the compound around the part of the seatpost that would be inserted into the seat tube. I then inserted the seatpost to give me the same saddle height. It felt quite different inserting the seatpost with the assembly compound, and straight away I knew it was already doing the job.

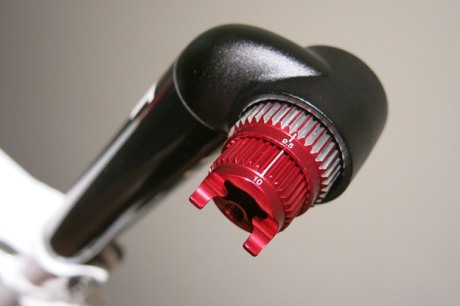
The 3T Ionic is again unique in being able to set micro adjustments to the saddle forward angle with a series of concentric teethed cyclinders providing the mount. Some of the online bike store reviews call this a gimmick, but for me it allows me to set the exact same saddle forward angle between all my steeds.
I tightened the inbuilt clamp bolts to the specified 5 N m of torque. This is critical not to over tighten carbon components, otherwise they quite literally collapse under the pressure. You can see my assistant mechanic, The Pok (AKA my son), in the background. He once again attempted to “steal” my hex keys.
Next I set the saddle into place, using the measurement from the centre of the headset cap to the tip of the saddle as my guide. I will probably still have to adjust my saddle front angle after I have the bike parallel. The saddle bolt clamps were specified to be tightened to 7 N m. Again the torque wrench came to use.
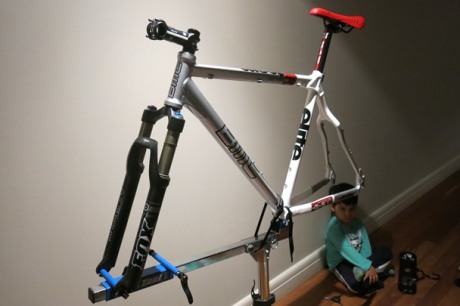
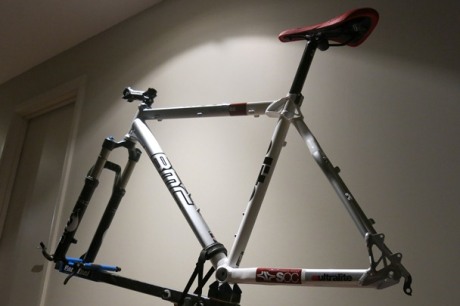
The frame is looking a bit frankenstein-like, but with the installation of the bars, that should make it look a lot more like a “bike”. Having said that, it is coming on! This is from the front…
and from the back…
The build continues 🙂


